|
|
| When I needed a particular theme fabric for an art quilt
and was low on funds, I resorted to another hobby of mine -- soft-block
carving. I used carved and stamped images to make my own unique
fabric. Below is the process I followed, and photos of each step. For more information and detailed instructions on soft-block carving, please visit my SOFT-BLOCK CARVING PAGE (link opens a new window). |
For this process you will need the following:
Note: Click on each image below to see a larger view. Close each image after viewing to return to this page. |
| First I found some copyright-free clip art of the images I
wanted. In this case, door keys. I subscribe to
clipart.com, an image
site, which has fabulous images you can use for a lot of different
hobbies. You can draw your own images, of course. I then transferred the
images and carved the blocks (for instructions on how to carve see the
link to my Soft-Block Carving site above). At right you can see the clip art images and my carved stamps. |
 |
| After carving the images, I used double-sided tape to
secure them to a wooden block. You don't necessarily need to use a wood
mount, but I feel it gives me more control than just the carved block. At top right is a mounted stamp, and at bottom right is the double-sided tape I used. |
 |
| You need to use pigment ink for this process. Dye ink
dries too quickly. I have found that Brilliance pigment ink is perfect. I
have it in both stamp pad form (readily available at craft and stamp
stores) and in re-inker bottles (available in some stamp stores and
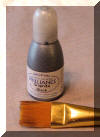
online). At right is a picture of a Brilliance re-inker and the flat stiff-bristled artist's brush I use. |
 |
| I use a brush to apply ink to the surface of the stamp. Don't apply it too heavily or it will blob up on the fabric. Practice! |
 |
| Use steady, even pressure to stamp the fabric. In this case, I used white Kona cotton. |
 |
| Voila! Here is the finished stamped fabric. When the ink is dry (10 minutes or so), press each stamped image using a hot iron. Press straight down, don't move the iron about. You should protect your iron with a pressing cloth just to be safe. |
 |
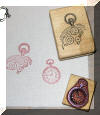
| You can also use commercial rubber stamps. At right is an example using stamps from my old stamp line. The red ink pad was a little dry, so the images are not as bright as they should be. |
 |
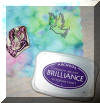
| You can also use the stamp pad itself rather than a re-inker -- just make sure it's well inked and that your stamp is completely covered. |
 |
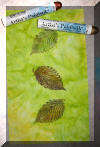
| To test how colorfast the Brilliance ink is, I took a
piece of fabric that I stamped and painted (using Shiva oil paint sticks)
some time ago. I heat-set the images with a hot iron, and then I hand
washed the fabric using mild soap. I ironed it again, and didn't notice
any degradation of the ink or the paint. Have fun! |
 |

