HOME TEMPLATES SAMPLES GALLERY MOUNTING INFORMATION EMAIL

Many happy Mirkwood Designs templates users have asked how they can help support my Web site. You can securely use your PayPal account or any major credit card. If you cannot make a monetary donation, I would appreciate your prayers. I thank you for your consideration, and may God bless you!

If you are not comfortable donating online, please click here for my snailmail address.

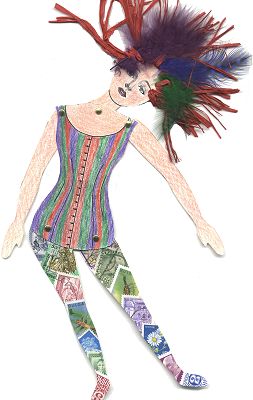
Paper Doll Template

CLICK HERE FOR THE PAPER DOLL TEMPLATE

For a sharper template in Adobe Acrobat format:
CLICK HERE FOR THE ADOBE ACROBAT FORMAT

Note: Please make sure your printing margins are set to .5 inches (half an inch) or the template may not print completely. In your browser's Menu bar,  select File > Page Setup, and change the margin settings to .5. (The selections may be slightly different between browsers.)

The finished doll measures 11 inches tall, but you can reduce or enlarge to suit your needs.

Supplies

  • Template (see above) (the template includes a blank head in case you want to stamp or draw your doll's face yourself)
  • 1 piece card stock 5" x 4"
  • Small brass paper fasteners (brads)

Tools

  • Scissors or craft knife
  • Hole punch

Other

  • Rubber stamps, inks, stickers, etc.
  • Embellishments such as ribbon, lace, beads, feathers, nylon tulle 
    (to make a tu tu!), etc.

Instructions

  1. Either print or trace the template page onto card stock. If you print directly onto card stock, you will be able to use the head with a face on it and the printed "corset."
  2. Cut out all pieces. If you printed your doll onto card stock, be careful to cut INSIDE the lines (so you don't end up with the outlines on your doll).
  3. Punch holes where indicated.
  4. Decorate parts as desired (you can wait to do this until assembled, if you prefer).
  5. Attach appendages to the torso with brads (the torso goes on top). The arms may go either way, depending on the look you want.
  6. Add embellishments such as hair (this is your chance to use all of the neat fibers that are available!), jewelry, clothing, a hat, etc. 
  7. To add hair, simply punch holes around the top of the head and tie fibers through. 

Alternatives

  • Attach the body parts with ribbon or fiber. If you do this, you might prefer to use eyelets to reinforce the holes.
  • Make a doll with shrink plastic -- this makes a great pin! I find it easier to use a small drill to make holes after the shrinking is done. Use wire or jump rings to attach the appendages.

Copyright 1999-2009 Mirkwood Designs, a division of ruthannzaroff.com
 These templates are free for your use to make craft items to give or sell, to use for teaching purposes, or for submitting projects to magazines.
I would appreciate it if you provide a link to my Web site.
The templates themselves may NOT be auctioned, sold, or published in any way without my permission.